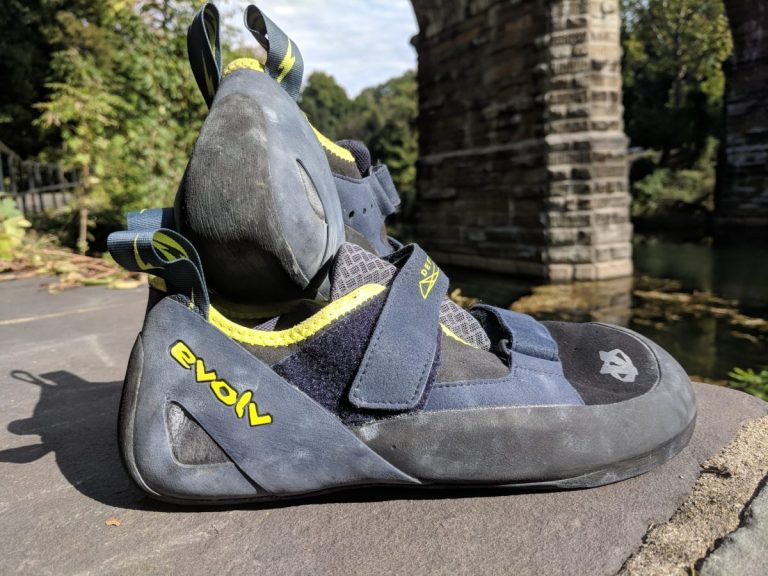
The Ultimate Guide to Breaking in Climbing Shoes: Tips and Tricks
Introduction
I grew up in a gym. I learned my first curse words on a chalky, sweat-stained gym mat. I got my first tattoo with the friends I did four-by-fours with. First boyfriend, even.
If there’s one thing that has held true over my years of cramming my feet into tiny, downturned rock shoes for the sake of performance, it’s that breaking in shoes sucks. Every time, no getting around it, a horrible experience. During one gym session, a friend said she’d pay to have someone break in her shoes for her. We were the same size, and I was pretty desperate for money at the time—but still, some things just aren’t worth it. And when you not only have to break in the shoes, but have a double training session ahead of you while your feet are screaming with pain? I’m sure that I cried once over it.
The Perplexity of Shoe Break-In
When the pandemic hit a year ago, suddenly I wasn’t going to the gym anymore. And because—at least at the beginning—nobody was sure about transmission via holds outside, I refrained from climbing rock as well. During that turbulent time, a funny thing happened: Either my feet flattened out or my tolerance for tiny shoes decreased. Because when gyms reopened and I tried to push myself through the break-in process again, suddenly it felt a lot more hateful.
A Game-Changing Tip
As I complained loudly (and probably all while looking desperate) at Monkey House Carbondale in December 2020, a local friend, the pro climber Dan Mirsky, overheard me.
“Try putting ‘em in the oven,” he said.
“No way. They’ll delaminate!” I protested.
“No, seriously. Just for a few minutes on the lowest setting. Game-changer.”
I took his tip, which I later learned he had originally gotten from another pro climber, Jonathan Siegrist, to heart. That night, I set up my station: oven, on the lowest setting (170 degrees), timer, and area on the carpet where I would dance around like a circus monkey. In the shoes went, for two minutes. I would then wear them for five to ten minutes—pacing, with some good ol’ fashioned calf raises mixed in—and then they’d go back in the oven, for another cycle or two. (Note: This only works with a standard oven, not a microwave—do not microwave your rock shoes or it will severely damage/deform them!)
Unbelievable Results
I couldn’t believe the results. Those brand-new puppies felt more akin to the pair you sweated in all summer and have yet to send to a resoler (God bless the person who has to touch that pair). It was one of those moments when you realize your life has changed forever.
A Wet Twist
And a fun fact for you, which I learned with more research: Leather stretches when wet (duh!). So try the oven thing, plus adding a sprinkling of water when they shoes are still hot, prior to donning them. And voilà! Your warm, wet shoes will slide right on and stretch even more.
Curious for his take, I reached out to Siegrist. “Yes, I do that sometimes!” he wrote. “Not as much any more, because I think I just simply get bigger shoes. Ha!”
A Parting Thought
And that, actually, might just be the best tip of all.
Note: While the author has successfully applied this tip on multiple occasions, as has Siegrist and Mirsky, not all shoemakers recommend. Scarpa, for example, has noted that this method of breaking in shoes will reduce glue strength and void shoe warranty.
Conclusion
Breaking in climbing shoes has always been a daunting task for climbers. The discomfort and pain can often take away from the joy of climbing. However, with the innovative technique of using an oven to expedite the break-in process, you can now enjoy your climbing experience like never before.
So, the next time you find yourself struggling with a new pair of climbing shoes, don’t hesitate to give the oven method a try. It might just revolutionize the way you break in your shoes and enhance your climbing performance.
Frequently Asked Questions
1. Is the oven method safe for all types of climbing shoes?
The oven method works well for most climbing shoes, but it’s essential to check with the manufacturer’s recommendations. Some shoemakers advise against using this method as it may affect glue strength.
2. How long should I keep my climbing shoes in the oven?
It’s recommended to place your climbing shoes in the oven for just a few minutes on the lowest setting, typically around 170 degrees Fahrenheit. Be cautious not to overheat them.
3. Can I use the oven method on synthetic climbing shoes?
The oven method is generally safe for leather climbing shoes. Synthetic shoes may not respond well to this method, so it’s best to consult the manufacturer’s guidelines.
4. Are there any alternative methods for breaking in climbing shoes?
While the oven method is effective, some climbers prefer traditional break-in techniques, such as wearing them during short climbing sessions or using shoe stretchers. Experiment with different methods to find what works best for you.
5. Can I use this method on my old climbing shoes to rejuvenate them?
Yes, the oven method can also breathe new life into older climbing shoes by making them more comfortable and performance-ready again. Just be cautious not to overheat or damage them in the process.
